How much should a guitar really cost?

There’s a huge price variation from one end of the spectrum to the other on the guitar market. Somewhere between the $50 “beginner” guitar and the $50,000 “collectors dream” lies a sensible sweet spot for your every day musician.

I’m going to try to help narrow that down. With the aid of a little perspective we’ll look at where you can expect to find the limits of the disposable toy price bracket and the brand name bloat price bracket.

As far as possible I’m going to try to avoid using actual dollar amounts to remove confusion over which currency I might be referring to, as well as inflation and price variation over time.


Back to basics: what does it cost to make a guitar?

First of all, let’s look at the timber. We all know the commonly used timbers for guitar building: mahogany, maple, alder, ash, and if weight is a consideration (or you’re an insufferable tight ass) bass wood.

Have a google around your local timber suppliers and have a look at the price tag on a decent slab of those timber species. Right off the bat this is starting to look prohibitive.

Now consider the cost of turning that timber into something playable. Some of you might consider shaping a guitar body yourself without too much difficulty. Fair enough.

Nailed it!

How about the neck though?

Sometimes you’ll find your local luthier or repair guy will post the cost of a re-fret on their website. Try to find that.

Now pick your chin up off the floor and consider this: if that’s what it costs to rip the old frets out and put new ones in, think about what it would cost to build the whole freaking neck from scratch.

This would be a great point to consider what you think would be a fair hourly rate for a skilled luthier to be paid.

With that in mind, let’s talk about finish. Paint, stain, lacquer etc isn’t free, and it takes time to apply. A lot of time. However long you think it probably takes to sand a piece of timber flat enough to apply finish, its likely twice that. Multiply that by the hourly rate you previously came up with, and you have a ball park figure of the cost just to make it look pretty.

You can easily get up around the $1500 – $2000 mark to have a luthier put together a fairly basic, nothing-fancy guitar. Mind you if you do this, you’ll have a one-of-a-kind, hand made guitar built to your specifications which will be worth every penny and then some.

If you have that kind of money spare you should definitely do this. You’ll be supporting your local luthier and end up with something really nice for around half the price of certain popular big brand name guitars. Quality control will likely leave the big-boys in the dust as well.

Although, there’s a fair chance that if you’re reading this blog you don’t have that kind of money to invest in a new guitar. The obvious question then is:


How can this whole process be made cheaper?

The most obvious thing to lower the cost is economy of scale. Bulk buying timber and hardware, shaping everything on CNC machines and assembling everything on a production line smashes the price down to next to nothing.

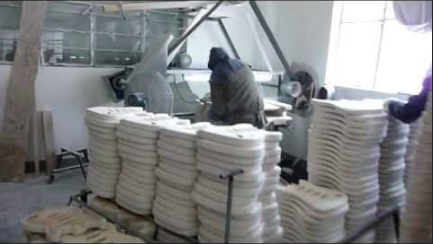
Despite this, labour still adds a significant cost. Someone still has to sand and finish these guitars, and CNC machines aren’t going to tackle fret work or check your intonation.

The cost of that labour varies depending on where in the world it happens. Knowing where your guitar was built can be a good indicator of what you’re paying for. China is notoriously cheap with its labour costs. That cost doubles if your guitar is made in Indonesia, double that again if it’s made in Korea, and more than double that figure to get one made in the US.

Some folks equate cost of labour with quality of labour. While there is definitely a case to be made for a reasonably consistent correlation between the two, it’s not always the case. You occasionally see good work coming out of China and glaring quality control oversights coming out of the US.


How low can you go?

There’s a few cost-cutting practices used with cheap guitars that have become fairly common practice.

You’ve no doubt noticed the beautifully figured flame/quilt/spalted maple caps on Les Paul style and PRS guitars. There’s no way you’re getting an actual maple cap on budget level guitars, so what’s going on here?

The most common method is to utilise a veneer. Aesthetically speaking, there’s nothing wrong with that, and some of them can look quite nice. They’re stained and finished the same way as their more expensive counterparts, and if you didn’t notice the price tag, you’d have a hard time telling it wasn’t the real deal.

Far less common and far more sinister is the use of an inkjet print-out under a clear coat, in an attempt to avoid using even a veneer of the proper timber or bearing the cost of applying a proper finish.

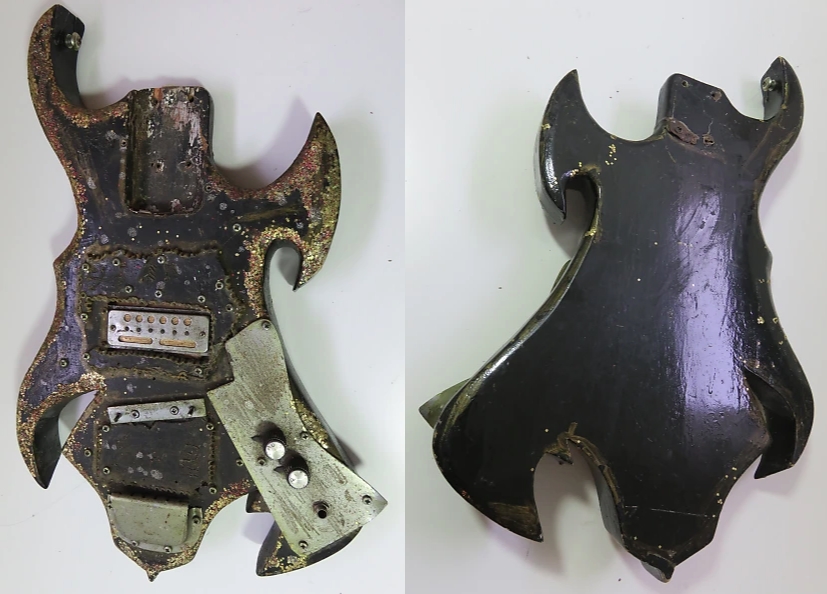
The fewer pieces of timber that get glued together to make the body of your instrument, the better it’s harmonic resonance and sustain. Finding one or two large slabs of wood with no knots or chips in it is difficult though, so where they exist, they come with a premium price tag.

The obvious cheap work around is to use many pieces of timber laminated together and cut to shape. Three or four piece bodies are fairly common and aren’t anything to worry about, but you’re starting to creep into compromise territory after that. Chances are if you’ve bought a cheap Asian guitar with a solid finish or a veneered top, they’ll be covering up a patch work collection of timber off cuts glued together.

To be clear, the sonic impact of doing this isn’t massive. There’s a good chance you won’t notice. Having a one or two piece body is just one of the many small things which work together in aggregate in a more expensive guitar to make you go “wow this guitar sounds so much more impressive than the cheaper guitars”.

Another production money-saver is using “pot metal” for the hardware. Pot metal tends to be a mash up of different kinds of recycled scrap metal. It lacks the usual structural integrity you might expect and can’t really be relied upon. If you’ve bought a dirt cheap Asian guitar you’d be well served to upgrade the bridge and tuners.

So that’s all there is to know about what you’re paying for when you buy a guitar right? Not exactly. Materials and labour probably make up about a quarter to a third of the retail price.


What you’re really paying for, and how to get around it

Everyone who handles the guitar wants a percentage of its value. That includes marketing, warehouse costs, shipping costs, retail mark up etc. By the time it hits the display at the retail store, that guitar has likely quadrupled in price.

It can be maddening to know that the majority of what you’re paying for has nothing to do with the cost of building the guitar. Here are a few things to consider if you want to beat the system:

  1. Get a cheap Asian guitar and upgrade its parts
    Once upon a time cheap Chinese guitars were unplayable pieces of junk. A lot has changed over the years, and while there are still likely to be a few quality control issues, the standard you’ll find these days is much higher.

Find an inexpensive guitar from a decent species of wood. Replace the pickups, tuners and bridge. Take your new guitar to your local luthier and recruit them to put it all together, give it a set up and get it playing like a professional quality instrument.

That whole process may cost you twice as much as the guitar itself. Bear in mind though, that if all these upgrades were already in place at the point of manufacture, you’d be paying four to five times the price at the retail end. An extra $100 on pickups at the start of the process adds $400-$500 to the total cost of the instrument by the time it gets to the shop.

  1. Buy second hand
    The cost of a decent second hand instrument should be in the same ball park as option one above. Realistically though, it’ll probably cost a little bit more, and will likely still end up in the hands of your local tech for a look over and a set up. This way though, you don’t have to deal with the social stigma of having a budget brand’s logo on your guitar.

The major advantage of buying second hand is you have a sporting chance of getting some money back when you sell it. If you have a high-end, well known brand of guitar it should retain a respectable resale value. Hardly anything else will.

  1. Buy a kit guitar and DIY
    I’m cautious about recommending this approach, but you may want to consider it.

Getting a kit guitar intercepts the whole process pretty close to the start. The same factories that churn out necks and bodies for well known brands also provide necks and bodies for kit guitars. By getting a kit you’re not only removing the cost of shipping and marketing, you’re also removing the cost of finishing and assembling the guitar by doing it yourself.

What might not be obvious is that you’re also skipping the quality control nip-n-tuck that most guitars get before moving on to fit and finish. The neck pocket might be a bit off, the fret work could be appalling, there could be a rough looking gap between the veneer and the binding – you get the idea.

This could potentially be an inexpensive way to end up with a unique guitar built to your specifications. It could also be a painfully frustrating and expensive lesson in why most folks leave guitar building to the experts.

Only do this if you’re equally motived to gain experience in guitar building and don’t mind the end result looking as amateur as it actually is.

If you do go with this method, give Pitbull Guitars a go. There are higher quality kits available, but you’ll have zero interaction with the supplier beyond adding the kit of choice to your kart and providing payment and shipping details.

With Pitbull you have a native English speaker operating the front end of the store who is more than happy to have a bit of to-and-fro by email to discuss customisations and modifications to standard kits. He’s also well aware of the unavoidable quality control issues with Chinese factories, and goes above and beyond in the name of customer service if what you receive doesn’t measure up.

At the premium end of the spectrum is Warmoth. By all accounts their quality control is fantastic and they come with a large range of customisations. You can even get them to do some of the finish and assembly for you.


How much should you spend?

So now you’ve got a decent idea of what you’re paying for when you buy a guitar, and hopefully that’ll give you some perspective on what a reasonable price to pay might be.

If the retail price of a guitar is dirt cheap, imagine what sort of quality parts and labour you’d get for a quarter of that price. If that thought horrifies you, walk away from the guitar – it’s likely junk.

Likewise, if the price tag is more than the cost of having a luthier build you a guitar by hand from scratch, they’re probably charging too much. You’re likely paying for a brand name and the reputation of the company rather than tangible improvements in build quality, playability or tone.


The Bottom Line

Being a guitarist is expensive. None of the gear is cheap, and if you buy some that is, you’ll spend a lot more along the journey towards discovering what you should have bought to begin with.

Have a long hard think about the sound you’re after, do your research into what type of gear can make that sound, check out reviews of equipment on your short list, and try to play that gear before you buy it. Try to make decisions based on what’s practical and appropriate, not based on the latest trends, flash marketing, or internet hype.

WARNING: Does your guitar have a nitro finish?

A lot of vintage guitars (and vintage re-issue guitars) have been finished with nitrocellulose lacquer. It’s usually applied fairly thinly, so you can still kind of feel the grain of the timber underneath. There’s an argument that not encasing your instrument in a thick layer of poly allows it vibrate more freely.

Many folks swear by guitars with a nitro finish and find any other kind of finish an abomination. Nitro finished guitars have a distinct look, feel, smell, sound, and for all I know, taste.

Howlin Wolf demonstrates his unique guitar licks


So what’s the problem?
Nitrocellulose lacquer never fully hardens, so it’s very easy to end up with dings and marks in it. It also happens to react with a bunch of common substances, making it quite difficult to preserve your lovely finish. When you consider that most guitars with a nitro finish happen to be reeeeeeaally expensive, that’s more than a little inconvenient.


What do we need to look out for?
While nitro seems to be allergic to just about everything, the main culprits tend to be rubber, vinyl, and plastics.

Unfortunately, finding a stand that doesn’t contain at least some of these at its contact points with the guitar is almost impossible. With at least 90% of all guitar stands being unsuitable, the safest place to keep your axe is in your hands or in its case.

I’ve heard horror stories of guitars left in stands where the finish had worn or degraded down to bare timber due to a chemical reaction with the stand.


How do we get around this?
First of all, there’s the utterly ghetto “raided laundry” approach. There’s nothing more incongruous than seeing a guitar worth thousands of dollars in a guitar stand with old socks or a cut up shirt draped over the contact points. It works, but you’re not exactly going to look like you have your act together in front of your musical peers.

Some folks cover the rubber contact points on their stand with a cut up garden hose, not realising the hose is made of PVC which is just as bad.

If you’re eyeing off a can cooler for the job, forget about it. Neoprene reacts with nitro as well.

Leather might work, but be mindful of any tanning or conditioning chemicals which may have been involved in the manufacturing process.

I know what you’re thinking: “if nitro finished guitars have been around for about 70 years or so, surely someone would have invented a suitable stand for them by now?”

There are a few options available, but I recommend extreme caution.


Hercules Stands
Many people swear by Hercules guitar stands. Anecdotal evidence from discussion forums would indicate that their “specially formulated rubber foam” doesn’t react with nitrocellulose. The company itself makes no such claim though, and if there’s even a trace of actual rubber in that foam, you’re in for heart break down the track.

I’ve heard at least one report of a small section of exposed plastic contacting a guitar and reacting with the finish. If you use a Hercules stand, just make sure only the padded parts of the stand contact your guitar. Otherwise it’s a bit like saying “sure the condom had a hole in it, but hey, at least I wore one”.

Hercules stands might be ok, and by all accounts they are, but I’m not sure I could bring myself to put a 1958 Les Paul in one.


String Swing
Likewise, a lot of people swear by String Swing products. The company thinks their products are fine for nitro, but stop short of offering a guarantee to that effect. This is from the FAQ section of their site:

Q: Are your products safe to use for guitars with a nitrocellulose lacquer finish?
A: Our material will not eat into the nitro of your guitar like most foams and rubbers do. Fender, Gibson, and Martin, all use our products in their showrooms, and for trade shows on their standard and high nitro finished guitars. However, there are some things that are out of our control that prevent us from putting an unconditional guarantee that no marking will ever occur.

  1. If an issue does arise there is no definite way for us to tell if the marks were caused by our products or if they were from a previously used product from another manufacturer.
  2. If you have used a guitar polish, be sure it is wiped off before you use our products. There is conflicting information on the internet as to whether polish is ever necessary or not. Also, along these same lines, do not use any chemical cleaners on our padding material. Water is fine if needed.
  3. Guitars being stored in any sunlight can be a big problem, regardless of what material is being used in resting the guitar.
  4. Nitro finish remains partially a liquid for its lifetime, so extended periods of time any significant pressure on the finish can result in pressure marks almost like a smear. This is worsened if the guitar was not given proper cure time when the finished was applied.

All of this being said we still have the safest material on the market for a nitro finished guitar and thousands of people trust hanging them every day. Also, if you have a nitro white Gibson, or Epiphone we have white yokes that we recommend for these extremely color sensitive finishes. If you decide to choose our products to display your guitars, for your peace of mind, we suggest that you check your guitars occasionally to be assured of their safety.


K&M Stands
This company specifically states that their stands are designed to not harm a nitro finish. Turns out the contact points are covered in either molded cork or thermoplastic elastomer, depending on the model in question. This is probably a winning solution, but it might be worth finding out what has been used to bind that cork.


It’s Not Just Stands…
While you’re getting paranoid about letting anything come into contact with your guitar, consider what else touches it:

  • Have a long, suspicious look at that capo before you clamp it on the neck.
  • If you use one of those tuners which clamp onto the head stock, be careful.
  • What are you using to clean or polish your guitar?
  • How about your hands? Soaps, lotions, and sanitizers etc can cause damage.


What about inside your case?
Maybe remove the strap from your guitar before locking it in its case: what are the chances it’s been manufactured with vinyl, rubber, or bits of plastic?

Do you wipe your guitar down with a rag after playing it?
Good for you!
Do you store that revolting sweat-sponge in your case with your guitar?
What the hell is wrong with you?

Not only will this introduce a stench to your case that will require an exorcism to remove, but a dubious rag with a potentially unknown past could be damaging your finish. Remove that rag immediately and apologise to your guitar. Hug it, and beg its forgiveness. Buy it flowers. Just don’t let the flowers touch the finish, because, well…

“I will eat your nitro”


It’s Probably Not That Bad
There is a lot of contradictory testimony over the fragility of nitrocellulose. A quick google search will bring up anecdotes from those who have damaged their guitars and rebuttals from those who think it’s nonsense. Some folks will tell you they regularly clean their nitro finished guitar with paint stripper and a wire brush and haven’t had a problem yet.

I believe one of the biggest contributing catalysts here might be heat and humidity. Perhaps those who utilise a rubber cushioned guitar stand haven’t had a problem due to living in a colder, dryer climate? Who knows. All I can tell you is, if you’ve spent a significant amount of money on a guitar with a nitro finish, you might not want to take any chances.

How guitar design affects sound


There’s a common theory that if you stretch guitar strings to pitch over a guitar pickup, what it’s all anchored to won’t make the slightest difference to the sound.

It’s hard to argue against that when you see things like Justin Johnson playing his shovel guitar:


…and Rev. Peyton with his axe guitar:


Many an internet argument has been slugged out over the validity of this concept. Guitar design does make a difference though, and hopefully I can demonstrate why and to what extent by comparing a few.


Scale Length and Pickup Placement
First things first, go and get your guitar. Yes, right now. I’ll wait.
Don’t worry about plugging it in.

Now, if you pick the strings close to the bridge, you’ll notice that there’s a fair bit of tension and the sound is fairly nasal and trebly. If you do the same thing closer to the neck you’ll notice much less tension and far less treble. It stands to reason then that a pickup in the bridge position is going to produce more top end than a pickup in the neck position.

That being the case, consider scale length for a moment (the length of the string from the nut to the 12th fret x 2). A guitar with a longer scale length is going to have more space between the neck and the bridge. The further the bridge pickup is from the neck, the more top end it’s going to offer up. Likewise, the further the neck pickup is from the bridge, the warmer or darker the tone will be.

Fender Strats and Telecasters are known for their bright tones. While there are a heap of factors responsible for this, the 25.5 inch scale length certainly plays a role. Gibson Les Pauls have a much warmer tone by comparison, and while again, there are many contributing factors at play, the much shorter 24.75 inch scale length is one of them.

Longer scale length means extra string tension, which will influence the way you play. The amount of downward pressure you have to apply to the strings with your fretting hand as a result will influence the tone, and how much vibrato you feel inclined to use. It could also influence how hard you hit the strings with your picking hand.


String Length
Beyond scale length, it’s worth pointing out that the required string length will differ from guitar to guitar. Scale length only matters up until the string passes over the saddle of the bridge, but the string is longer than this.

In some cases the strings will terminate at a tailpiece a long way from the bridge. Some will pass through the body of the guitar, and others stop short just behind the bridge.

Likewise, different headstock designs place the tuning pegs at different distances from the nut.

String length contributes to string tension, affects sustain, and influences how you interact with the guitar.


The Bridge
The full weight of a vibrating string is taken up by the saddle of the bridge. Because of this, the bridge transfers the strings’ vibration to the body of the guitar. Different bridge designs handle this differently, with some transferring vibration more efficiently than others. This will ultimately have an effect on note sustain, and the tonal characteristics of those notes as they gradually fade out.


Size and Weight
From there, the tone of the sustained note (and the length of its sustain) is influenced by the wood of the body that the bridge transfers this vibration to. Most folks can agree that, to a certain extent, the more wood (and more weight) your guitar has, the more sustain it will likely have.


Now for one of the most bitterly disputed concepts of guitar tone ever to be discussed on the internet:


Tone Wood
Different species of timber carry vibration in different ways, and this (reportedly, through subjective observation and not measurable science) contributes different tonal qualities. It’s perfectly OK if you don’t agree with this, there’s no need for death threats in the comments section.

It’s important to note that wood won’t add qualities to your sound. The influence of timber in your tone is reductive.

For example, a harder wood (like maple) will absorb lower frequencies more, allowing for a brighter sound. A softer wood (like mahogany) will absorb higher frequencies better, allowing a warmer sound to resonate.

When the two are combined (like a Les Paul with a mahogany slab and a carved maple top), the high and low frequencies are absorbed, resulting in a sound which favours mid frequencies.

The tonal impact of timber species is so subtle that a slight tweak of a tone knob would completely over ride its influence. So if that’s the case, is it worth worrying about wood?

Well, yes. Here’s why:


It all adds up
Many aspects of guitar sound make such a small contribution to your overall tone that some would argue that it’s trivial. The average person in the audience won’t notice the tonal difference if you swap guitars mid set to one with a different timber species or bridge design.

Every little bit adds up together though.

The audience will notice the headline act “just sounds better”. They don’t know it’s because the band has carefully chosen every piece of equipment to have complimentary tonal characteristics. They just assume it’s because the sound guy phones it in for the opening act.

The tonal characteristics of any one piece of equipment should be considered when deciding what to add to your rig as a whole to get the sound you’re after. There’s no point buying something and then tweaking the rest of your gear to fight against its tonal contribution.


The Moral of the Story
When choosing a guitar, consider the sound you’re after. What amp will you be plugging it into? What sort of sound will the guitar need to have to interact with the amp to produce the overall sound you want?

You should also choose a guitar that feels comfortable to play.

When shopping for a guitar and trying them out in the store, make sure that you plug into the sort of amp you have at home and play the stuff you intend on playing once you buy it. There’s no point in ripping out shred metal leads to impress the sales staff and other customers if you’ll be buying the guitar to play rhythm in a ska band. It has to feel and sound right playing your music on it.

Ultimately though, you’re probably just going to buy a guitar that looks really cool. If it makes your heart skip a beat and all day long you’re inspired to pick it up and play it, then it’s still the right choice. You may want to consider the tonal characteristics that it brings to the table though, and set the rest of your rig up to work well with it.

Understanding Pickups

In this post I’m going to try to de-mystify pickups. We’ll go over how they’re made and how they work, what’s available, and things to bear in mind when choosing pickups. This will hardly be an exhaustive explanation, but at the very least will hopefully be a springboard for your own Google and Wikipedia searches.

This is a massive topic, so I suppose a sensible place to start would be at the beginning.


Where it all began
It was around 1936 by the time guitar manufacturers stopped mucking around with horse-shoe magnets and the like, and Gibson came out with what we know as the “Charlie Christian” pickup.

It had a bunch of wire wrapped around a bobbin with a metal “blade” running along the middle of it under the strings. Beneath that coil there were two flat bar magnets. These pickups had a clear sound and relatively high output, but were fairly noisy by today’s standards. Mind you, there wasn’t much in the way of fluorescent or dimmable lights back then to contribute interference.

You can still buy modern versions of these, although they’re mostly used by jazz guitarists chasing a particular vintage sound.


P-90s
In the early 40s Gibson upgraded from the “Charlie Christian” to the P-90. They used thinner wire and managed to get much more of it wound on the bobbin. The blade was gone in favour of six individual pole pieces lined up with the strings. This pickup had a brighter sound and higher output.

P-90s are still quite common these days, and modern versions are somewhat less noisy. They’re mostly used in a rock, blues, or punk context, as they couple quite nicely with overdrive. Having said that, some pretty sweet jazz sounds can be obtained with a P-90 in the neck position.


Fender’s Single Coils
In the early 50s Fender threw their hat in the ring. They brought out the Telecaster and Stratocaster which had their own design of pickups in them.

Leo Fender was a notorious tight-ass, so it came as no surprise when his pickups were made more efficiently and with less materials. Instead of great big bar magnets under the coil with pole pieces poking up through the bobbin, these pickups utilised six individual magnetic slugs for pole pieces.

They had less noise, lower output, and a crisper, brighter tone than P-90s.


Humbuckers
So far all these pickups had a tendency to hum. A lot of fuss has been made about this “60 cycle” hum, but truth be told it’s only really a big problem:

  • At high gain settings
  • When you stop playing and keep your volume right up, and
  • If you’re standing at the wrong angle to your amp

Still, around 1955 a Gibson employee by the name of Seth Lover attempted to create a version of the P-90 that didn’t hum. The end result looked a lot like two of Fender’s single coil pickups back-to-back with reverse winding and reverse polarity.

The two opposing coils cancelled out each other’s hum. They produced a higher output and tended to be a bit warmer/darker sounding than their single coil predecessors.


How does pickup construction affect sound?

Output
High output can be great for adding fuel to a high gain sound. An amp set to the limit of its clean sound can be pushed past edge-of-break-up into overdrive when you wind you’re guitar’s volume knob up. It’s important to remember that with high signal strength usually comes some amount of compression. This helps with sustain but can reduce playing dynamics. It won’t matter how hard or soft you hit the strings, the volume remains the same.

Low output pickups can make a mild overdrive seem almost clean without the signal strength to make it break up adequately. On the other hand, the lack of compression means greater pick sensitivity and dynamic scope, which allows for more expressive playing. Your sound gets louder and quieter according to your pick attack.


Wire
The higher the KΩ rating, the more wire there is likely to be on the pickup. More wire usually results in higher output and warmer tone. Likewise, a thicker gauge of wire will typically have a warmer tone. Conversely, less wire and thinner wire would typically mean a brighter tone with lower output.


Magnets
Generally speaking, the stronger the magnet, the higher the output of the pickup. Having the strength of a pickup’s signal bolstered by the strength of the magnet means you don’t need as much wire to achieve the same output level. This allows for high output pickups with a bright sound.

The most common types of magnets found in guitar pickups are alnico (aluminium, nickel, cobalt) and ceramic. Alnico magnets will commonly have a number associated with them. The higher the number, the stronger the magnet. Ceramic magnets tend to be stronger than Alnico.

So if you’ve ever wondered how you can get different tones from different pickups, hopefully this helps explain it. You can mix and match magnet strength with quantity and thickness of wire to achieve different levels of output and brightness or warmth.


Comparatively speaking…

With all that in mind it would be fair to make the following observations:

Fender style single coils are some of the lowest output and brightest sounding pickups around. This is particularly true with strats.

Tele bridge pickups can be a bit of an anomaly. They’re positioned on a bit of an angle, as they’re too big for the guitar and the pole pieces wouldn’t line up with the strings if they weren’t installed like that. They were originally re-purposed lap steel pickups (did I mention Leo Fender was a tight-ass?), hence their odd size.

In order for a bit of wire to complete one loop around the larger bobbin, it would have to be longer. As a result you have more wire and higher output on a tele bridge pickup than you would typically get from a strat. They also have a metal base plate which adds to the output and arguably the tone as well.

Being bright with high output leaves the Tele bridge pickup in similar sonic territory to a P-90:

  • Single coil dynamics/pick sensitivity
  • Not quite as high output as a humbucker but more than a strat single coil
  • Not quite as bright as a strat but brighter than a humbucker


Choosing Pickups

If you’re thinking about changing your pickups you’ll need to consider:

  • The level of output you’re after
  • Tonal preference (may need bright pickups if plugging into a dark sounding amp and vice versa)
  • The size and shape of the route on your guitar where you’ll be installing said pickup. These days pickup manufacturers have managed to produce:
    • Single coil sized humbuckers
    • Humbucker sized P-90s
    • “Active” pickups with a built in pre amp for even higher output and tone shaping capabilities. These require an extra section routed out of your guitar to allow for a battery compartment.


After sorting that out, you’ll want to check out the catalogues of a few brands to see what they offer that meets your needs. Once you have a short list of contenders, I’d advise going to Youtube and searching for that particular pickup model and your amp to hear examples of how they go together. Look up a few written reviews, but take those with a grain of salt.

Ultimately the best way to decide would be to play a guitar with that pickup in it plugged into your amp, but that’s rarely possible.


Brands

If you’re going to put together a short list, you’ll need to get an idea of what’s out there. I’ve compiled a very short list of brands here to get you started.

Its almost impossible to have a discussion about after market pickups and not mention Seymour Duncan. They have an extensive range of professional quality pickups and are probably one of the most popular brands on the market.

Likewise with DiMarzio. For many years they’ve been Ibanez’s first choice for pickups. They have a similar range and reputation to Seymour Duncan and are well worth checking out.

Fender and Gibson sell their own pickups as aftermarket upgrades. If you’d like to add a taste of their legendary tone to a cheaper guitar, this could be one way to go about it.

Bareknuckle are rapidly gaining a reputation for high quality pickups, especially in the high output department.

EMG have a popular range and have built a reputation around their active pickups. Famously endorsed by James Hetfield and used by a long list of other metal guitarists.


For many years there wasn’t a lot of competition in the pickup market, and manufacturers could pretty much name their price. This set a precedent, and most pickups tend to be unjustifiably expensive. Some more recent pickup manufacturers are looking to buck that trend.


Firstly, there’s IronGear Pickups. Their whole philosophy is that you shouldn’t have to spend a huge amount of money to achieve outstanding tone. They pride themselves on their attention to detail with tone and quality control at reasonable prices.

They’re out to give the major players a run for their money. While I’m not sure they’ll bother them too much in terms of market share, their pickups are definitely worth a listen.

Secondly, there’s Tonerider. While they’re not thumping their chests and declaring a crusade against the big boys like IronGear seem to be, their range of pickups are at a similar price point and level of quality. Do yourself a favour and check them out.