Know Your Dirt

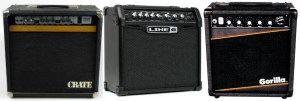
In the world of high gain guitar sounds we have boost, overdrive, distortion, and fuzz.

Boost can add a little gain and EQ shaping with a bit of a kick in volume.

Overdrive was born from the sound of an amp literally being driven too hard. This term could cover anything from an almost clean edge-of-break-up sound, to a cranked Marshall sound.

Distortion is a bit like overdrive on steroids, with more aggressive clipping and more compression.

Fuzz is a different thing altogether. This is where we encounter some of the harshest “square wave” clipping available.

Then there’s the grey area where these overlap. When these sounds were initially discovered there were no clear distinctions between them. Some boosts creep into overdrive territory. Some overdrives could just as easily be described as distortion, or dialed back and used as a boost. There are at least a handful of pedals around where internet debates continue to rage over whether they’re distortion or fuzz.


Overdrive Pedal Types

The number of overdrive pedals on the market right now is staggering. If you took one of each model and piled them on top of each other, you could use it as a bridge to Mars and save Elon Musk a lot of bother.

Mercifully though, many of them fall into categories which help when you’re comparing them to decide what you’re after. Let’s take a look at a few.
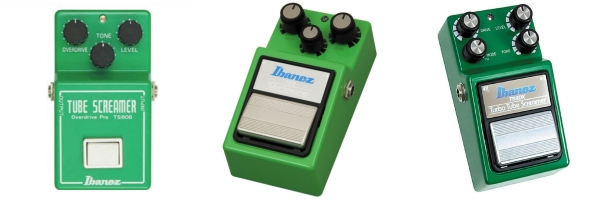

Tube Screamers
Ibanez brought out the tube screamer as an overdrive pedal designed not so much to bring all the crunch on its own, but to push the front end of a tube amp into its own overdrive. It dumps your bottom end and cranks your mid range right up, with some mild clipping for good measure.

Some folks use these after their regular overdrive or distortion as a lead boost. Others use it before their distortion to clean up an otherwise boomy bottom end. You’ll often see these in front of a Peavey 5150/6505 or Mesa Boogie Dual Rectifier in metal bands for this reason.

  • First there was the TS808 described above (and the small version, the Tube Screamer Mini).
  • Then the TS9, a bit brighter and harsher sounding, and arguably more aggressive.
  • The TS9DX which was a TS9 with more settings, including one which leaves the bottom end in tact.
  • The TS10, which by all accounts seems to be a cheaply made TS9, maybe with a smidge more gain on offer.


…then everyone copied it with their own little touches here and there:

  • Behringer has a dirt cheap clone with the exact same circuit as the TS808, but in a cheap plastic housing.
  • Also at the budget end of the spectrum is the Mooer Green Mile.
  • JHS have artfully captured every variation of the originals from TS808 to TS10 plus a few others in their “Bonsai” pedal.

Nearly every pedal manufacturer out there has their own version of a Tube Screamer, so if you need to tighten your bottom end and push your mids, you have a lot of options open to you.


Blues Breaker
In 1966 John Mayall and the Blues Breakers recorded what became known as “the Beano Album”. Eric Clapton’s guitar sound on that album was obtained by way of a Marshall 1962 combo amp (JTM45) with everything cranked up to 11. That album made blues history, and so did Clapton’s tone. The amp went on to be nick-named the “Blues Breaker” as a result.

A pivotal moment in blues guitar history

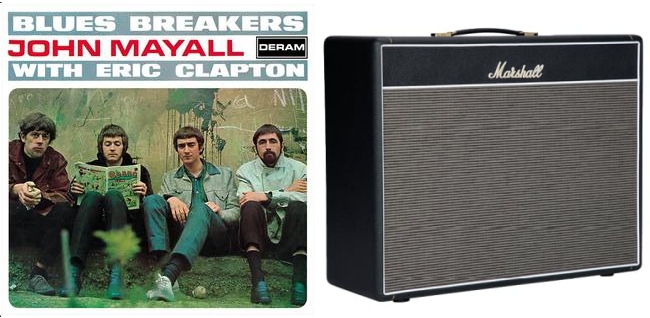
Skip forward to the early 90s and Marshall brings out an overdrive pedal based on that sound, this time officially called the Blues Breaker. It provided a mild, transparent overdrive, with a healthy amount of top end and just enough break-up to turn heads.

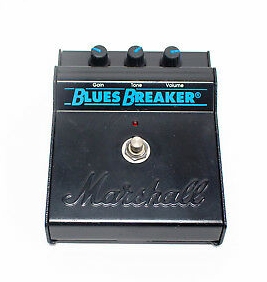
Two things drove the popularity of this pedal through the roof:

  1. It soon went out of production
  2. It was spotted on John Mayer’s pedal board around the time he started to become a household name

Since then, many pedal manufacturers have produced “Blues Breaker style” pedals. These pedals typically use the original as a starting point but then add their own subtle spin on it.

The first and most notorious was Analogue Man’s “King of Tone“. It brings a little bit more gain than the original and is essentially two of the same overdrive pedals in the one enclosure. This allows you to experiment with gain stacking and boosting one with the other. The single pedal version is called the Prince of Tone. If you don’t want to join the 2-3 year waiting list for a new King of Tone, and don’t want to pay collector’s prices for a second hand one, there’s always budget clones to consider.

Other Blues Breaker style pedals include the JHS Morning Glory, Pantheon by Wampler, and 1962 by Keeley.


Klon Centaur
Between 1990 and 1994 around 8000 hand built Klon Centaurs were sold. They were so highly sought after that since being discontinued, some have been selling for thousands of dollars.

The Klon is one of the most versatile drives around. It gives a slight upper mid boost, but for the most part just adds gain without touching your tone. At low gain settings it can act as a clean boost. Wind up the treble knob and we’re heading towards treble booster territory. Of course, wind the gain up and magic happens.

Klons differ from Tube Screamers in that they don’t roll off your bottom end, have higher headroom, and don’t compress as much. Their mid boost is a higher mid frequency than the one that Tube Screamers boost.

Another run of these pedals was released in 2014 under the name “KTR”. Printed on the front of these are the words “Kindly remember: the ridiculous hype that offends so many is not of my making”.

There are more clones of this pedal (or Klones as they’re affectionately known) than any other.

At the budget end of the spectrum we have:
Mosky Golden Horse
Caline Pegasus
Joyo Tauren

Electro-Harmonix Soul Food is at the pricier end of the budget list, but quite popular.

J Rocket Archer and Wampler Tumnus are among the most respected Klon style pedals. Wampler also has the Tumnus Deluxe which includes bass, mid, and treble controls.

The Ryra “Klone” is considered an almost immaculate part-for-part clone of the original.


So now if you hear someone talking about a Tube Screamer type, Blues Breaker type, or Klon type overdrive, you know what they’re talking about.


A few other worthy mentions:

The Boss BD-2 Blues Driver is a simple, decent sounding, full frequency overdrive that stacks well with others. It’s inexpensive and doesn’t attract a lot of hype, but is well respected and gets the job done.

The Fulltone OCD has become a bit of an institution. While most pedals will have a few useful sounds at different points along the sweep of their gain knob, the OCD sounds great across its whole range. It can go from a subtle dirty boost all the way through to aggressive distortion. Version 1 of these had a somewhat mid-pushed sound; the versions that came after it are a little mid-scooped.


Classic Distortion Pedals

The Boss DS-1 was one of the first widely adopted distortion pedals on the market. It’s pretty much remained a staple on pedal boards since then. Like the BD-2, it’s inexpensive, well regarded, and gets the job done. The top end is a bit harsh for some rigs, so you might need to turn the tone down to get a good sound out of it.

The Boss HM-2, dubbed “The Swedish Chainsaw”, was a key part of the guitar sound for bands like Entombed and At the Gates. The way it handles bottom end makes it perfect for low tunings. The odd thing about this pedal is that it has a massive dead spot on the gain knob between 3 and 8 o’clock. That didn’t seem to matter to those on the Swedish metal scene, as they only used one classic setting: every knob all the way up.

They’re out of production now* and fetch a somewhat elevated price second hand, as their appeal has never died off. Luckily there are a few decent modern adaptions available like the Walrus Audio “Red” and the Lone Wolf Audio “Left Hand Wrath”. Of course, where there’s an old Boss pedal there’s usually a cheap Behringer clone of it. Not to disappoint, Behringer has the HM300 with a more pronounced mid range.

*Update: Boss has just released a “Waza Craft” version of this pedal. Well worth checking out.

No discussion of distortion pedals would be complete without mentioning the fabled Metal Zone. The Boss MT-2 is probably the most mocked and maligned pedal ever to hit the market. It features

  1. Such a high noise floor it’s practically unusable
  2. A gain knob that goes from “gee that’s a lot of gain” at zero to “no one could possibly use this much gain” at around the half way point.
  3. A ridiculously broad range of overly sensitive EQ controls that make it incredibly easy to dial in a terrible tone, and a major project to find a good one (which the slightest bump will change back to a crap one)
  4. As an added bonus at no extra charge, the social stigma of being spotted with one on your pedal board.
Visual representation of the sound of the Boss MT-2

Still, whether for irony, comedy, or perhaps *cough* different *cough* tastes, some folks still go after these. Apparently they don’t sound as bad if you put them through your effects loop. I’m not convinced.

In the confusing cross-over department:
There’s the Pro Co Rat, which sounds like a really aggressive distortion pedal, but is actually a fuzz circuit.

The Big Muff, which gets used interchangeably as a fuzz or distortion but is in fact neither. Accurately speaking, a Big Muff can only truly be classified as a Big Muff. Probably the most accurate description I’ve ever heard was “think of it as the noisiest compressor you’ve ever heard and go from there.”

Just like they’ve done with Tube Screamer sounds in the Bonsai, JHS have collected just about every variation on the Big Muff there ever was and crammed it into one pedal: The Muffuletta.

Fuzz

In the world of classic fuzz there is the Tone Bender and the Fuzz Face, with both spawning endless clones, tributes and adaptations. The Tone Bender has more pronounced mids and treble (great for cutting through the mix), while the Fuzz Face is known for its earth-shattering fat bottom end, amply demonstrated by Jimi Hendrix.

There are almost as many varieties of fuzz pedals on the market as there are overdrives. Combining fuzz with octave is a fairly classic one. For reference, check out the MXR Octave Fuzz.

JHS have released their version of re-issues of 4 classic fuzz pedals with their “Legends of Fuzz” line. Check out the Fuzz Face inspired Smiley, the Tone Bender inspired Bender, the Big Muff inspired Crimson, and the Univox Octave Fuzz inspired Supreme.

A quick word about transistors in fuzz pedals:
Fuzz circuits that utilise germanium transistors can sound like a million bucks, until you expose them to hot conditions which make them sound like rubbish. Silicon transistors are more consistent and aren’t affected by heat, but aren’t held in as high regard by tone purists. Honestly though, if you plug into a silicon Fuzz Face and don’t get a killer tone, I wouldn’t go blaming the silicon.

Enough for now!

That’s probably way too much information for a single blog post, but hopefully it’ll provide a good starting point for anyone trying to make sense of high gain pedals.

Tips for working with overdrive and distortion

For the vast majority of folks reading this, I’ll bet it was over driven guitar sounds that inspired you to start playing in the first place. So here’s what typically happens when amateur guitarists start their journey into dirty sounds:

You plug into your “affordable” practice amp and push it into overdrive territory. Chances are it sounds horrible. You have a listen to some of your favourite recordings as a reference point, and notice how big and clear everything sounds. Now then, back to the amp.

You crank the gain and tweak the EQ until it sounds big, clear, and epic. Chances are you’ve messed around with the “mid” knob and discovered that turning it up muddies the sound while turning it down gets you close to the sound of your favourite recordings.

In your bedroom that sounds great. When you finally get in a band though, something weird happens: you step on the distortion and your sound disappears.

What the hell is going on?


Frequencies
A live band setting is a competition for sonic real estate, and if you’ve scooped out your mids, you’ve already lost. The bass guitar and bass drum dominate the low end, and the drummer’s cymbals own the top end. Your pathetic little guitar sound doesn’t stand a chance in the high and low frequency ranges when up against those sonic giants. Turns out your place is in the mid range.

First of all, you’re not an idiot for turning down the mid when dialing in your sound. On a lot of inexpensive amps, the mid knob mostly controls lower mid which sounds awful when turned up. The frequencies that are going to make you cut through the mix are in the upper mid range.


Every guitarist’s deepest desire

Also, if you listened to a few recordings for reference, the overall mix of the whole band was probably somewhat mid-scooped. You’ve tried to emulate that with your guitar sound, which is understandable.

Probably the best approach would be to set all your EQ knobs to 12 o’clock, have your band make a lot of noise, hit a chord and then make subtle adjustments until you get a sound you like.

When you do this, you might be surprised how little bottom end you need. It doesn’t cut through the mix anyway and might be muddying up your sound. I’ve heard it said that some sound guys will drop the bottom end right down on the guitar channel of their mixer before they’ve heard you play a note. If you tune right down for heavy music, rest assured your sound will be bottom heavy anyway because of your tuning. Be low in pitch, not EQ.


Gain and Compression
When you add gain, you also add compression. With compression, the loudest parts of your sound get quieter, and the quiet parts of your sound get louder.

Those quiet frequencies suddenly getting turned up plays a big role in why we like high gain sounds. There’s a lot more easily observable harmonic content, so the whole thing sounds rich and complex, like a whole orchestra coming out of your guitar. Also, with more of your guitar’s frequencies lifted (and kept up) by this compression, it takes a lot longer for a note to fade out.

So we have a sound that’s full, rich, and sustaining for days. Where’s the problem? Well the louder frequencies have also gotten quieter and your overall sound is perceived as being smaller.

We get so used to the idea that turning up the gain introduces more clipping, that we expect our sound to get bigger and more aggressive the more we turn it up. Doing so turns up your compression which actually contributes to a quieter sound. Aint that a kick in the pants?

As with setting your EQ knobs, you’d be well served to set your gain knob while your band makes a racket. Start down low and roll it up to taste, remembering to only use as much as you feel you need. Cranking it all the way up is pointless and silly, as it will do nothing to increase your volume or testicular diameter.


So that’s where your sound went. You’ve started with a nice big uncompressed clean tone, turned on your distortion and suddenly all that compression has squeezed your signal to a shadow of its former self. Your only hope of being heard was if your EQ had some obnoxiously high mids dialed in, but chances are you scooped those out.


Balancing clean and dirty sounds.
It’s possible to use the power of compression for good instead of evil. Adding a little to your clean sound will add some much needed sustain, and smooth out your transients. Transients are those little spikes in volume that happen when you hit one note louder than another.

A funny thing happens in the ears of audience members when they hear these transients. Their perception of your overall volume is arrived at by taking the average of your regular guitar signal and these transients. It feels like you’re louder than you actually are.

So when you turn on your overdrive and introduce compression (utterly squashing those transients into line), it feels as though you’ve gone from a loud clean sound to a quiet dirty one. The solution here is to turn down the gain on your dirty sound and add compression to your clean sound.

The obvious way to do this would be to use a compression pedal for your clean sound. The not so obvious way is to leave your overdrive on all the time, and flip between dirty and clean sounds by rolling your guitar’s volume knob up and down.


Using a boost for solos
So you’ve compressed your clean sound, and tweaked your gain and EQ for your dirty sounds, but you’re still having trouble getting heard when you play leads.

The answer here is to have a boost that you turn on when you take a solo. This could be a separate setting on a multi-channel high-gain amp, or a boost pedal.

A good solo tone is one you can hear

Mick & Dan, “That Pedal Show”

Be prepared to dial in a sound you wouldn’t ordinarily lean on too much so that your quieter single note playing can cut through the mix better.

Your boosted sound should typically have much less bottom end, heaps more mids, a bold amount of high end, and a subtle increase in overall volume level. If you were on your own and strumming chords, this might sound positively revolting. In a full band setting while you rip out a solo, it’s surprisingly effective.

How guitar design affects sound


There’s a common theory that if you stretch guitar strings to pitch over a guitar pickup, what it’s all anchored to won’t make the slightest difference to the sound.

It’s hard to argue against that when you see things like Justin Johnson playing his shovel guitar:


…and Rev. Peyton with his axe guitar:


Many an internet argument has been slugged out over the validity of this concept. Guitar design does make a difference though, and hopefully I can demonstrate why and to what extent by comparing a few.


Scale Length and Pickup Placement
First things first, go and get your guitar. Yes, right now. I’ll wait.
Don’t worry about plugging it in.

Now, if you pick the strings close to the bridge, you’ll notice that there’s a fair bit of tension and the sound is fairly nasal and trebly. If you do the same thing closer to the neck you’ll notice much less tension and far less treble. It stands to reason then that a pickup in the bridge position is going to produce more top end than a pickup in the neck position.

That being the case, consider scale length for a moment (the length of the string from the nut to the 12th fret x 2). A guitar with a longer scale length is going to have more space between the neck and the bridge. The further the bridge pickup is from the neck, the more top end it’s going to offer up. Likewise, the further the neck pickup is from the bridge, the warmer or darker the tone will be.

Fender Strats and Telecasters are known for their bright tones. While there are a heap of factors responsible for this, the 25.5 inch scale length certainly plays a role. Gibson Les Pauls have a much warmer tone by comparison, and while again, there are many contributing factors at play, the much shorter 24.75 inch scale length is one of them.

Longer scale length means extra string tension, which will influence the way you play. The amount of downward pressure you have to apply to the strings with your fretting hand as a result will influence the tone, and how much vibrato you feel inclined to use. It could also influence how hard you hit the strings with your picking hand.


String Length
Beyond scale length, it’s worth pointing out that the required string length will differ from guitar to guitar. Scale length only matters up until the string passes over the saddle of the bridge, but the string is longer than this.

In some cases the strings will terminate at a tailpiece a long way from the bridge. Some will pass through the body of the guitar, and others stop short just behind the bridge.

Likewise, different headstock designs place the tuning pegs at different distances from the nut.

String length contributes to string tension, affects sustain, and influences how you interact with the guitar.


The Bridge
The full weight of a vibrating string is taken up by the saddle of the bridge. Because of this, the bridge transfers the strings’ vibration to the body of the guitar. Different bridge designs handle this differently, with some transferring vibration more efficiently than others. This will ultimately have an effect on note sustain, and the tonal characteristics of those notes as they gradually fade out.


Size and Weight
From there, the tone of the sustained note (and the length of its sustain) is influenced by the wood of the body that the bridge transfers this vibration to. Most folks can agree that, to a certain extent, the more wood (and more weight) your guitar has, the more sustain it will likely have.


Now for one of the most bitterly disputed concepts of guitar tone ever to be discussed on the internet:


Tone Wood
Different species of timber carry vibration in different ways, and this (reportedly, through subjective observation and not measurable science) contributes different tonal qualities. It’s perfectly OK if you don’t agree with this, there’s no need for death threats in the comments section.

It’s important to note that wood won’t add qualities to your sound. The influence of timber in your tone is reductive.

For example, a harder wood (like maple) will absorb lower frequencies more, allowing for a brighter sound. A softer wood (like mahogany) will absorb higher frequencies better, allowing a warmer sound to resonate.

When the two are combined (like a Les Paul with a mahogany slab and a carved maple top), the high and low frequencies are absorbed, resulting in a sound which favours mid frequencies.

The tonal impact of timber species is so subtle that a slight tweak of a tone knob would completely over ride its influence. So if that’s the case, is it worth worrying about wood?

Well, yes. Here’s why:


It all adds up
Many aspects of guitar sound make such a small contribution to your overall tone that some would argue that it’s trivial. The average person in the audience won’t notice the tonal difference if you swap guitars mid set to one with a different timber species or bridge design.

Every little bit adds up together though.

The audience will notice the headline act “just sounds better”. They don’t know it’s because the band has carefully chosen every piece of equipment to have complimentary tonal characteristics. They just assume it’s because the sound guy phones it in for the opening act.

The tonal characteristics of any one piece of equipment should be considered when deciding what to add to your rig as a whole to get the sound you’re after. There’s no point buying something and then tweaking the rest of your gear to fight against its tonal contribution.


The Moral of the Story
When choosing a guitar, consider the sound you’re after. What amp will you be plugging it into? What sort of sound will the guitar need to have to interact with the amp to produce the overall sound you want?

You should also choose a guitar that feels comfortable to play.

When shopping for a guitar and trying them out in the store, make sure that you plug into the sort of amp you have at home and play the stuff you intend on playing once you buy it. There’s no point in ripping out shred metal leads to impress the sales staff and other customers if you’ll be buying the guitar to play rhythm in a ska band. It has to feel and sound right playing your music on it.

Ultimately though, you’re probably just going to buy a guitar that looks really cool. If it makes your heart skip a beat and all day long you’re inspired to pick it up and play it, then it’s still the right choice. You may want to consider the tonal characteristics that it brings to the table though, and set the rest of your rig up to work well with it.

Understanding Pickups

In this post I’m going to try to de-mystify pickups. We’ll go over how they’re made and how they work, what’s available, and things to bear in mind when choosing pickups. This will hardly be an exhaustive explanation, but at the very least will hopefully be a springboard for your own Google and Wikipedia searches.

This is a massive topic, so I suppose a sensible place to start would be at the beginning.


Where it all began
It was around 1936 by the time guitar manufacturers stopped mucking around with horse-shoe magnets and the like, and Gibson came out with what we know as the “Charlie Christian” pickup.

It had a bunch of wire wrapped around a bobbin with a metal “blade” running along the middle of it under the strings. Beneath that coil there were two flat bar magnets. These pickups had a clear sound and relatively high output, but were fairly noisy by today’s standards. Mind you, there wasn’t much in the way of fluorescent or dimmable lights back then to contribute interference.

You can still buy modern versions of these, although they’re mostly used by jazz guitarists chasing a particular vintage sound.


P-90s
In the early 40s Gibson upgraded from the “Charlie Christian” to the P-90. They used thinner wire and managed to get much more of it wound on the bobbin. The blade was gone in favour of six individual pole pieces lined up with the strings. This pickup had a brighter sound and higher output.

P-90s are still quite common these days, and modern versions are somewhat less noisy. They’re mostly used in a rock, blues, or punk context, as they couple quite nicely with overdrive. Having said that, some pretty sweet jazz sounds can be obtained with a P-90 in the neck position.


Fender’s Single Coils
In the early 50s Fender threw their hat in the ring. They brought out the Telecaster and Stratocaster which had their own design of pickups in them.

Leo Fender was a notorious tight-ass, so it came as no surprise when his pickups were made more efficiently and with less materials. Instead of great big bar magnets under the coil with pole pieces poking up through the bobbin, these pickups utilised six individual magnetic slugs for pole pieces.

They had less noise, lower output, and a crisper, brighter tone than P-90s.


Humbuckers
So far all these pickups had a tendency to hum. A lot of fuss has been made about this “60 cycle” hum, but truth be told it’s only really a big problem:

  • At high gain settings
  • When you stop playing and keep your volume right up, and
  • If you’re standing at the wrong angle to your amp

Still, around 1955 a Gibson employee by the name of Seth Lover attempted to create a version of the P-90 that didn’t hum. The end result looked a lot like two of Fender’s single coil pickups back-to-back with reverse winding and reverse polarity.

The two opposing coils cancelled out each other’s hum. They produced a higher output and tended to be a bit warmer/darker sounding than their single coil predecessors.


How does pickup construction affect sound?

Output
High output can be great for adding fuel to a high gain sound. An amp set to the limit of its clean sound can be pushed past edge-of-break-up into overdrive when you wind you’re guitar’s volume knob up. It’s important to remember that with high signal strength usually comes some amount of compression. This helps with sustain but can reduce playing dynamics. It won’t matter how hard or soft you hit the strings, the volume remains the same.

Low output pickups can make a mild overdrive seem almost clean without the signal strength to make it break up adequately. On the other hand, the lack of compression means greater pick sensitivity and dynamic scope, which allows for more expressive playing. Your sound gets louder and quieter according to your pick attack.


Wire
The higher the KΩ rating, the more wire there is likely to be on the pickup. More wire usually results in higher output and warmer tone. Likewise, a thicker gauge of wire will typically have a warmer tone. Conversely, less wire and thinner wire would typically mean a brighter tone with lower output.


Magnets
Generally speaking, the stronger the magnet, the higher the output of the pickup. Having the strength of a pickup’s signal bolstered by the strength of the magnet means you don’t need as much wire to achieve the same output level. This allows for high output pickups with a bright sound.

The most common types of magnets found in guitar pickups are alnico (aluminium, nickel, cobalt) and ceramic. Alnico magnets will commonly have a number associated with them. The higher the number, the stronger the magnet. Ceramic magnets tend to be stronger than Alnico.

So if you’ve ever wondered how you can get different tones from different pickups, hopefully this helps explain it. You can mix and match magnet strength with quantity and thickness of wire to achieve different levels of output and brightness or warmth.


Comparatively speaking…

With all that in mind it would be fair to make the following observations:

Fender style single coils are some of the lowest output and brightest sounding pickups around. This is particularly true with strats.

Tele bridge pickups can be a bit of an anomaly. They’re positioned on a bit of an angle, as they’re too big for the guitar and the pole pieces wouldn’t line up with the strings if they weren’t installed like that. They were originally re-purposed lap steel pickups (did I mention Leo Fender was a tight-ass?), hence their odd size.

In order for a bit of wire to complete one loop around the larger bobbin, it would have to be longer. As a result you have more wire and higher output on a tele bridge pickup than you would typically get from a strat. They also have a metal base plate which adds to the output and arguably the tone as well.

Being bright with high output leaves the Tele bridge pickup in similar sonic territory to a P-90:

  • Single coil dynamics/pick sensitivity
  • Not quite as high output as a humbucker but more than a strat single coil
  • Not quite as bright as a strat but brighter than a humbucker


Choosing Pickups

If you’re thinking about changing your pickups you’ll need to consider:

  • The level of output you’re after
  • Tonal preference (may need bright pickups if plugging into a dark sounding amp and vice versa)
  • The size and shape of the route on your guitar where you’ll be installing said pickup. These days pickup manufacturers have managed to produce:
    • Single coil sized humbuckers
    • Humbucker sized P-90s
    • “Active” pickups with a built in pre amp for even higher output and tone shaping capabilities. These require an extra section routed out of your guitar to allow for a battery compartment.


After sorting that out, you’ll want to check out the catalogues of a few brands to see what they offer that meets your needs. Once you have a short list of contenders, I’d advise going to Youtube and searching for that particular pickup model and your amp to hear examples of how they go together. Look up a few written reviews, but take those with a grain of salt.

Ultimately the best way to decide would be to play a guitar with that pickup in it plugged into your amp, but that’s rarely possible.


Brands

If you’re going to put together a short list, you’ll need to get an idea of what’s out there. I’ve compiled a very short list of brands here to get you started.

Its almost impossible to have a discussion about after market pickups and not mention Seymour Duncan. They have an extensive range of professional quality pickups and are probably one of the most popular brands on the market.

Likewise with DiMarzio. For many years they’ve been Ibanez’s first choice for pickups. They have a similar range and reputation to Seymour Duncan and are well worth checking out.

Fender and Gibson sell their own pickups as aftermarket upgrades. If you’d like to add a taste of their legendary tone to a cheaper guitar, this could be one way to go about it.

Bareknuckle are rapidly gaining a reputation for high quality pickups, especially in the high output department.

EMG have a popular range and have built a reputation around their active pickups. Famously endorsed by James Hetfield and used by a long list of other metal guitarists.


For many years there wasn’t a lot of competition in the pickup market, and manufacturers could pretty much name their price. This set a precedent, and most pickups tend to be unjustifiably expensive. Some more recent pickup manufacturers are looking to buck that trend.


Firstly, there’s IronGear Pickups. Their whole philosophy is that you shouldn’t have to spend a huge amount of money to achieve outstanding tone. They pride themselves on their attention to detail with tone and quality control at reasonable prices.

They’re out to give the major players a run for their money. While I’m not sure they’ll bother them too much in terms of market share, their pickups are definitely worth a listen.

Secondly, there’s Tonerider. While they’re not thumping their chests and declaring a crusade against the big boys like IronGear seem to be, their range of pickups are at a similar price point and level of quality. Do yourself a favour and check them out.

So what's this all about then?

Hi, my name is Andy, and I’m a gear-a-holic.

My early attempts to hide my shame from family and loved ones resulted in me buying low quality gear from questionable characters who definitely didn’t have my best interests at heart. I was a young guitarist with a fair idea of the sort of sound I wanted, and no idea how to get it. They don’t teach you this stuff in school, and sales staff in music shops are rarely going to present the facts as you need to hear them.

I’ve spent years of my life and thousands of dollars messing about with the wrong gear, and I know I’m not alone. It doesn’t have to be like this.

The aim of this blog is to share what I’ve learned and provide a few shortcuts for those just starting out on their journey. For many readers, a lot of what I write will seem completely obvious. Please bear in mind there are plenty of people who won’t find it obvious and may be too afraid to ask. These folks are my target audience.

I can’t stress enough that I’m not an expert. I’m not a professional touring musician and I’m nobody’s guitar tech. I’m just a guy on the internet who wants to help prevent others from making the same mistakes I’ve had to learn from. I’d like to encourage feedback in the comments section, especially if you feel something about my content is just plain wrong. We’re all here to share and learn, and I’ve yet to learn anything by being right. I only ask that you try to be nice about it.


Disclaimer:
My main motivation here is helping others understand the fundamentals of guitar sound, not making money. Having said that, there are costs associated with this, and it would be nuts not to (at least to some extent) monetise the site. To that end you’ll see some ads here and there, and affiliate links to sites where you can buy some of the gear I mention.

Buying gear through those links won’t cost you any extra, but the site in question will throw me some chump change for directing traffic to them. On that note, Amazon.com requires me to state this: “As an Amazon Associate I earn from qualifying purchases.”